Define the Quality Gates and Continuous Integration
In this section, we will guide you through setting up quality gates and continuous integration (CI) in your workflow. You’ll learn how to configure checkpoints to ensure your code meets standards and how to automate integration and testing using CI tools.
The setup of quality gates and CI may vary depending on the technologies and tools used in the project, but at a high level, they follow these key steps: code style checking or static code analysis (linting), vulnerability scanning for dependencies and the codebase, project building, and executing various tests.
We will mainly edit the package.json file in this section. Open that file and follow the steps below.
Build & Test Steps
The build and test steps are already included in this workshop’s setup. Let’s test them.
Step 1: Run the build command to transpile the TypeScript code to JavaScript.
npm run build
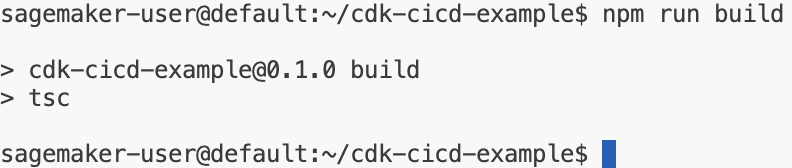
Congratulations! You’ve successfully compiled the project. Your code is now transpiled from TypeScript to JavaScript.
Step 2: Run the test command to execute the Unit tests.
npm run test
Well done! You’ve completed running the unit tests. These checks ensure that your code behaves as expected.
Unifying Code Style and Static Code Checks
Step 3: Install ESLint
For NPM projects, it’s common to use eslint for code styling and static code analysis. To install eslint, run the following command:
npm install --save-dev eslint @eslint/core @eslint/js @types/eslint__js typescript typescript-eslint @stylistic/eslint-plugin
Step 4: Create the ESLint Configuration File
Create a file called eslint.config.mjs in the project root with the following content:
import eslint from '@eslint/js';
import tseslint from 'typescript-eslint';
import stylistic from '@stylistic/eslint-plugin';

export default tseslint.config(
  eslint.configs.recommended,
  ...tseslint.configs.strict,
  ...tseslint.configs.stylistic,
  stylistic.configs.customize({
    indent: 2,
    quotes: 'single',
    semi: true,
  }),
  {
    ignores: [
      'node_modules/**/*',
      'cdk.out/**/*',
      '**/*.js',
      '**/*.d.ts',
    ],
  },
  {
    rules: {
      '@stylistic/eol-last': ['off'], // workshop code removes the tailing spaces, that is why this rule disabled
      '@typescript-eslint/no-useless-constructor': ['warn'], // AWS CDK example code has useless constructor
    },
  },
);
Great job! You’ve set up your ESLint configuration, which will help maintain code quality and uniformity across the project.
Step 5: Add the lint script to package.json
Open the package.json file and insert a new script called lint like this: "lint": "eslint ."
Your package.json should look like:
{
  "name": "cdk-cicd-example",
  "version": "0.1.0",
  "scripts": {
    "build": "tsc",
    "test": "jest",
    "lint": "eslint .",
    "cdk": "cdk"
  }
}
Step 6: Run the lint script to test it.
npm run lint
Congratulations! You’ve successfully run the linter. Your code is now checked for style and potential errors.
Security Scan of Third-Party Dependencies and Codebase
Step 7: Add a Third-Party dependency audit step
Edit the package.json and include the audit step for dependencies:
"audit:deps": "cdk-cicd check-dependencies --npm --python"
This command will analyze both NPM and Python dependencies and report any known vulnerabilities.
Awesome! You’ve added an important step to scan your third-party dependencies for vulnerabilities.
Step 8: Add a security scan step for the codebase
Include the security scan for the source code in package.json:
"audit:security-scan": "cdk-cicd security-scan --bandit --semgrep --shellcheck"
This will run scanners (Bandit, Semgrep, Shellcheck) on the codebase to detect security risks.
Well done! You’ve set up the security scan to keep your code safe from common vulnerabilities.
Ensure package.json Integrity
Step 9: Validate package.json
Edit the package.json and include the following validation script:
"validate": "cdk-cicd validate"
To run the validation:
npm run validate
This may fail on the first execution since validation hasn’t been executed before. To fix it, run:
npm run validate -- --fix
Fantastic! You’ve ensured that your configuration is now validated, keeping your project secure and consistent.
Verifying Third-Party Licenses
Step 10: Audit licenses
Edit package.json to include a license audit step:
"audit:license": "cdk-cicd license"
To run the license audit:
npm run audit:license
It may fail the first time because it verifies the existence of the NOTICE file in your repository. Fix it by running:
npm run audit:license -- --fix
This will generate the NOTICE file and the OSS_License_Summary.csv summarizing the used license types in your project.
Congrats! You’ve completed the license audit, ensuring all third-party dependencies are legally valid and accounted for.
Concurrent Execution of Audits
Running multiple security checks can take time, so it's beneficial to parallelize them.
Step 10: Edit the package.json to include:
"audit": "concurrently 'npm:audit:*'"
Install the dependency:
npm install --save-dev concurrently
Run the audit command:
npm run audit
If the audit fails due to package.json modifications, run:
npm run audit:license -- --fix
npm run validate -- --fix
Then, re-run:
npm run audit
Amazing! You’ve successfully parallelized your audit tasks, saving time while ensuring your code remains safe and compliant.
Summary
By the end of this section, we have defined all the necessary steps for a high-quality, robust CI pipeline for an AWS CDK-based project. These include:
- validate: Ensures our configuration isn’t tampered with.
- build: Ensures our code compiles correctly.
- test: Ensures tests are executed.
- lint: Ensures code style and quality.
- audit: Ensures dependencies are vulnerability-free and legally valid, and the codebase doesn't introduce security risks.
Show Solution
The package.json file should look like this:
{
  "name": "cdk-cicd-example",
  "version": "0.1.0",
  "bin": {
    "cdk-cicd-example": "bin/cdk-cicd-example.js"
  },
  "scripts": {
    "build": "tsc",
    "watch": "tsc -w",
    "test": "jest",
    "lint": "eslint .",
    "audit": "concurrently 'npm:audit:*'",
    "audit:deps": "cdk-cicd check-dependencies --npm --python",
    "audit:security-scan": "cdk-cicd security-scan --bandit --semgrep --shellcheck",
    "audit:license": "cdk-cicd license",
    "validate": "cdk-cicd validate",
    "cdk": "cdk"
  },
  "devDependencies": {
    "@eslint/js": "^9.10.0",
    "@stylistic/eslint-plugin": "^2.8.0",
    "@types/eslint__js": "^8.42.3",
    "@types/jest": "^29.5.12",
    "@types/node": "22.5.4",
    "aws-cdk": "2.158.0",
    "concurrently": "^9.0.1",
    "eslint": "^9.10.0",
    "jest": "^29.7.0",
    "ts-jest": "^29.2.5",
    "ts-node": "^10.9.2",
    "typescript": "~5.6.2",
    "typescript-eslint": "^8.6.0"
  },
  "dependencies": {
    "@cdklabs/cdk-cicd-wrapper": "^0.2.12",
    "@cdklabs/cdk-cicd-wrapper-cli": "^0.2.10",
    "aws-cdk-lib": "2.158.0",
    "constructs": "^10.0.0",
    "source-map-support": "^0.5.21"
  }
}
You’ve completed setting up all your quality gates and continuous integration steps. You now have a strong foundation for building, testing, and securing your AWS CDK project!
Click Next to continue to the next section.