Develop a GenAI Solution with CDK CI/CD Workbench
What is Workbench?
A Workbench is a dedicated development environment where infrastructure code can be created, tested, and iterated upon before it's mature enough to be deployed through an automated pipeline. It’s particularly useful for development teams that don’t have personal AWS accounts for testing and experimentation. The Workbench allows developers to simulate their infrastructure changes in a safe environment without affecting the production pipeline. This ensures that the infrastructure code evolves and stabilizes before it’s promoted to deployment.
Now, let’s go through the steps to create a GenAI solution using the Workbench.
Create an ECS Cluster in the Workbench
Step 1: Create the Infrastructure Stack
We’ll begin by creating a file for defining an ECS Cluster.
- Create a file in
lib/demo-stack.tsand add the following content:
import * as cdk from 'aws-cdk-lib';
import { Construct } from 'constructs';
import * as ecs from 'aws-cdk-lib/aws-ecs';

export class DemoStack extends cdk.Stack {
  constructor(scope: Construct, id: string, props?: cdk.StackProps) {
    super(scope, id, props);

    // Create an ECS Cluster
    new ecs.Cluster(this, 'DemoCluster', {
      clusterName: cdk.Names.uniqueResourceName(this, {
        maxLength: 50,
      }),
      enableFargateCapacityProviders: true,
      containerInsights: true,
    });
  }
}
Congratulations! You’ve successfully created the infrastructure definition for an ECS Cluster.
Step 2: Extend the Pipeline with a DEV Stage
- Open the
bin/cdk-cicd-example.tsfile and modify the pipeline to add a DEV stage as the Workbench target. - Replace the
.defineStagesblock with the following:
.defineStages([
  { stage: wrapper.Stage.RES, account: process.env.AWS_ACCOUNT_ID },
  { stage: wrapper.Stage.DEV, account: process.env.AWS_ACCOUNT_ID },
])
Well done! You’ve extended the pipeline to include a DEV stage, which will act as your Workbench.
Step 3: Deploy the DEV Stage Configuration
Since we’ve defined a new stage with an environment variable, we need to deploy this change to the AWS SSM Parameter Store.
-
Run the following command to deploy the new stage:
npm run cdk deploy -- --allOr you can deploy the specific SSM parameter stack:
npm run cdk deploy -- cdk-cicd-exampleSSMParameterStack
Great! The DEV stage has been successfully deployed.
Step 4: Define the Workbench
- Update the pipeline to define the Workbench by adding the following code:
.workbench({
  provide(context) {
    new DemoStack(context.scope, 'DemoStack', { env: context.environment });
  },
})
- Import the
DemoStackclass at the top of the file:
import { DemoStack } from '../lib/demo-stack';
This code integrates the DemoStack into the Workbench environment.
Fantastic! The Workbench has been successfully set up.
Show Solution
The bin/cdk-cicd-example.ts file should look like this:
#!/usr/bin/env node
import 'source-map-support/register';
import * as cdk from 'aws-cdk-lib';
import * as wrapper from '@cdklabs/cdk-cicd-wrapper';
import { DemoStack } from '../lib/demo-stack';

const app = new cdk.App();

wrapper.PipelineBlueprint.builder()
  .defineStages([
    { stage: wrapper.Stage.RES, account: process.env.AWS_ACCOUNT_ID },
    { stage: wrapper.Stage.DEV, account: process.env.AWS_ACCOUNT_ID },
  ])
  .workbench({
    provide(context) {
      new DemoStack(context.scope, 'DemoStack', { env: context.environment });
    },
  })
  .synth(app);
Deploy the Workbench
Now that the Workbench has been set up, let’s deploy it to the AWS account.
Step 5: Add a Utility Script to Package.json
- Open the
package.jsonfile. -
Add a utility script element for the Workbench:
"workbench": "cdk -c workbench=true"
Nice job! The Workbench utility script has been added to your project.
Step 6: Deploy the Workbench
Run the following command to deploy the Workbench environment:
npm run workbench deploy -- --all
This command will likely fail due to security checks.

Great start! Now, let’s address the deployment issues.
Step 7: Resolve CDK-Nag Errors
The CDK CI/CD Wrapper uses CDK-Nag to ensure secure and compliant deployments. Let’s resolve any errors that arise during the Workbench deployment.
- Open the
lib/demo-stack.tsfile. -
Add the following line to ensure proper logging for security purposes:
cluster.vpc.addFlowLog('demo-flow-log');
Well done! You’ve ensured that your infrastructure is secure and compliant.
Show Solution
The lib/demo-stack.ts file should look like this:
import * as cdk from 'aws-cdk-lib';
import { Construct } from 'constructs';
import * as ecs from 'aws-cdk-lib/aws-ecs';

export class DemoStack extends cdk.Stack {
  constructor(scope: Construct, id: string, props?: cdk.StackProps) {
    super(scope, id, props);

    // Create an ECS Cluster
    const cluster = new ecs.Cluster(this, 'DemoCluster', {
      clusterName: cdk.Names.uniqueResourceName(this, {
        maxLength: 50,
      }),
      enableFargateCapacityProviders: true,
      containerInsights: true,
    });

    cluster.vpc.addFlowLog('demo-flow-log');
  }
}
Step 8: Redeploy the Workbench
-
Run the following command to redeploy the Workbench after addressing the security checks:
npm run workbench deploy -- --allDuring deployment, you will be asked to approve new AWS IAM permissions. Type ‘y’ to confirm.
The Workbench has been successfully deployed with the security issues resolved.
Workbench Environment & User Separation
You might notice that the new stacks have a sagemakeruser prefix, which corresponds to the active username in the CodeEditor. This behavior ensures that workbench deployments are tied to individual users, allowing multiple developers to share the same AWS account without interfering with each other’s work.
Share the code with the team
Step 10: Commit and Push the Changes
-
Run the following commands to validate and commit the changes:
npm run audit:license -- --fix
npm run validate -- --fix
npm run lint -- --fix
git add .
git commit -m "feat: ECS cluster created in workbench"
git push
Congratulations! You’ve successfully committed your changes and pushed them to the repository.
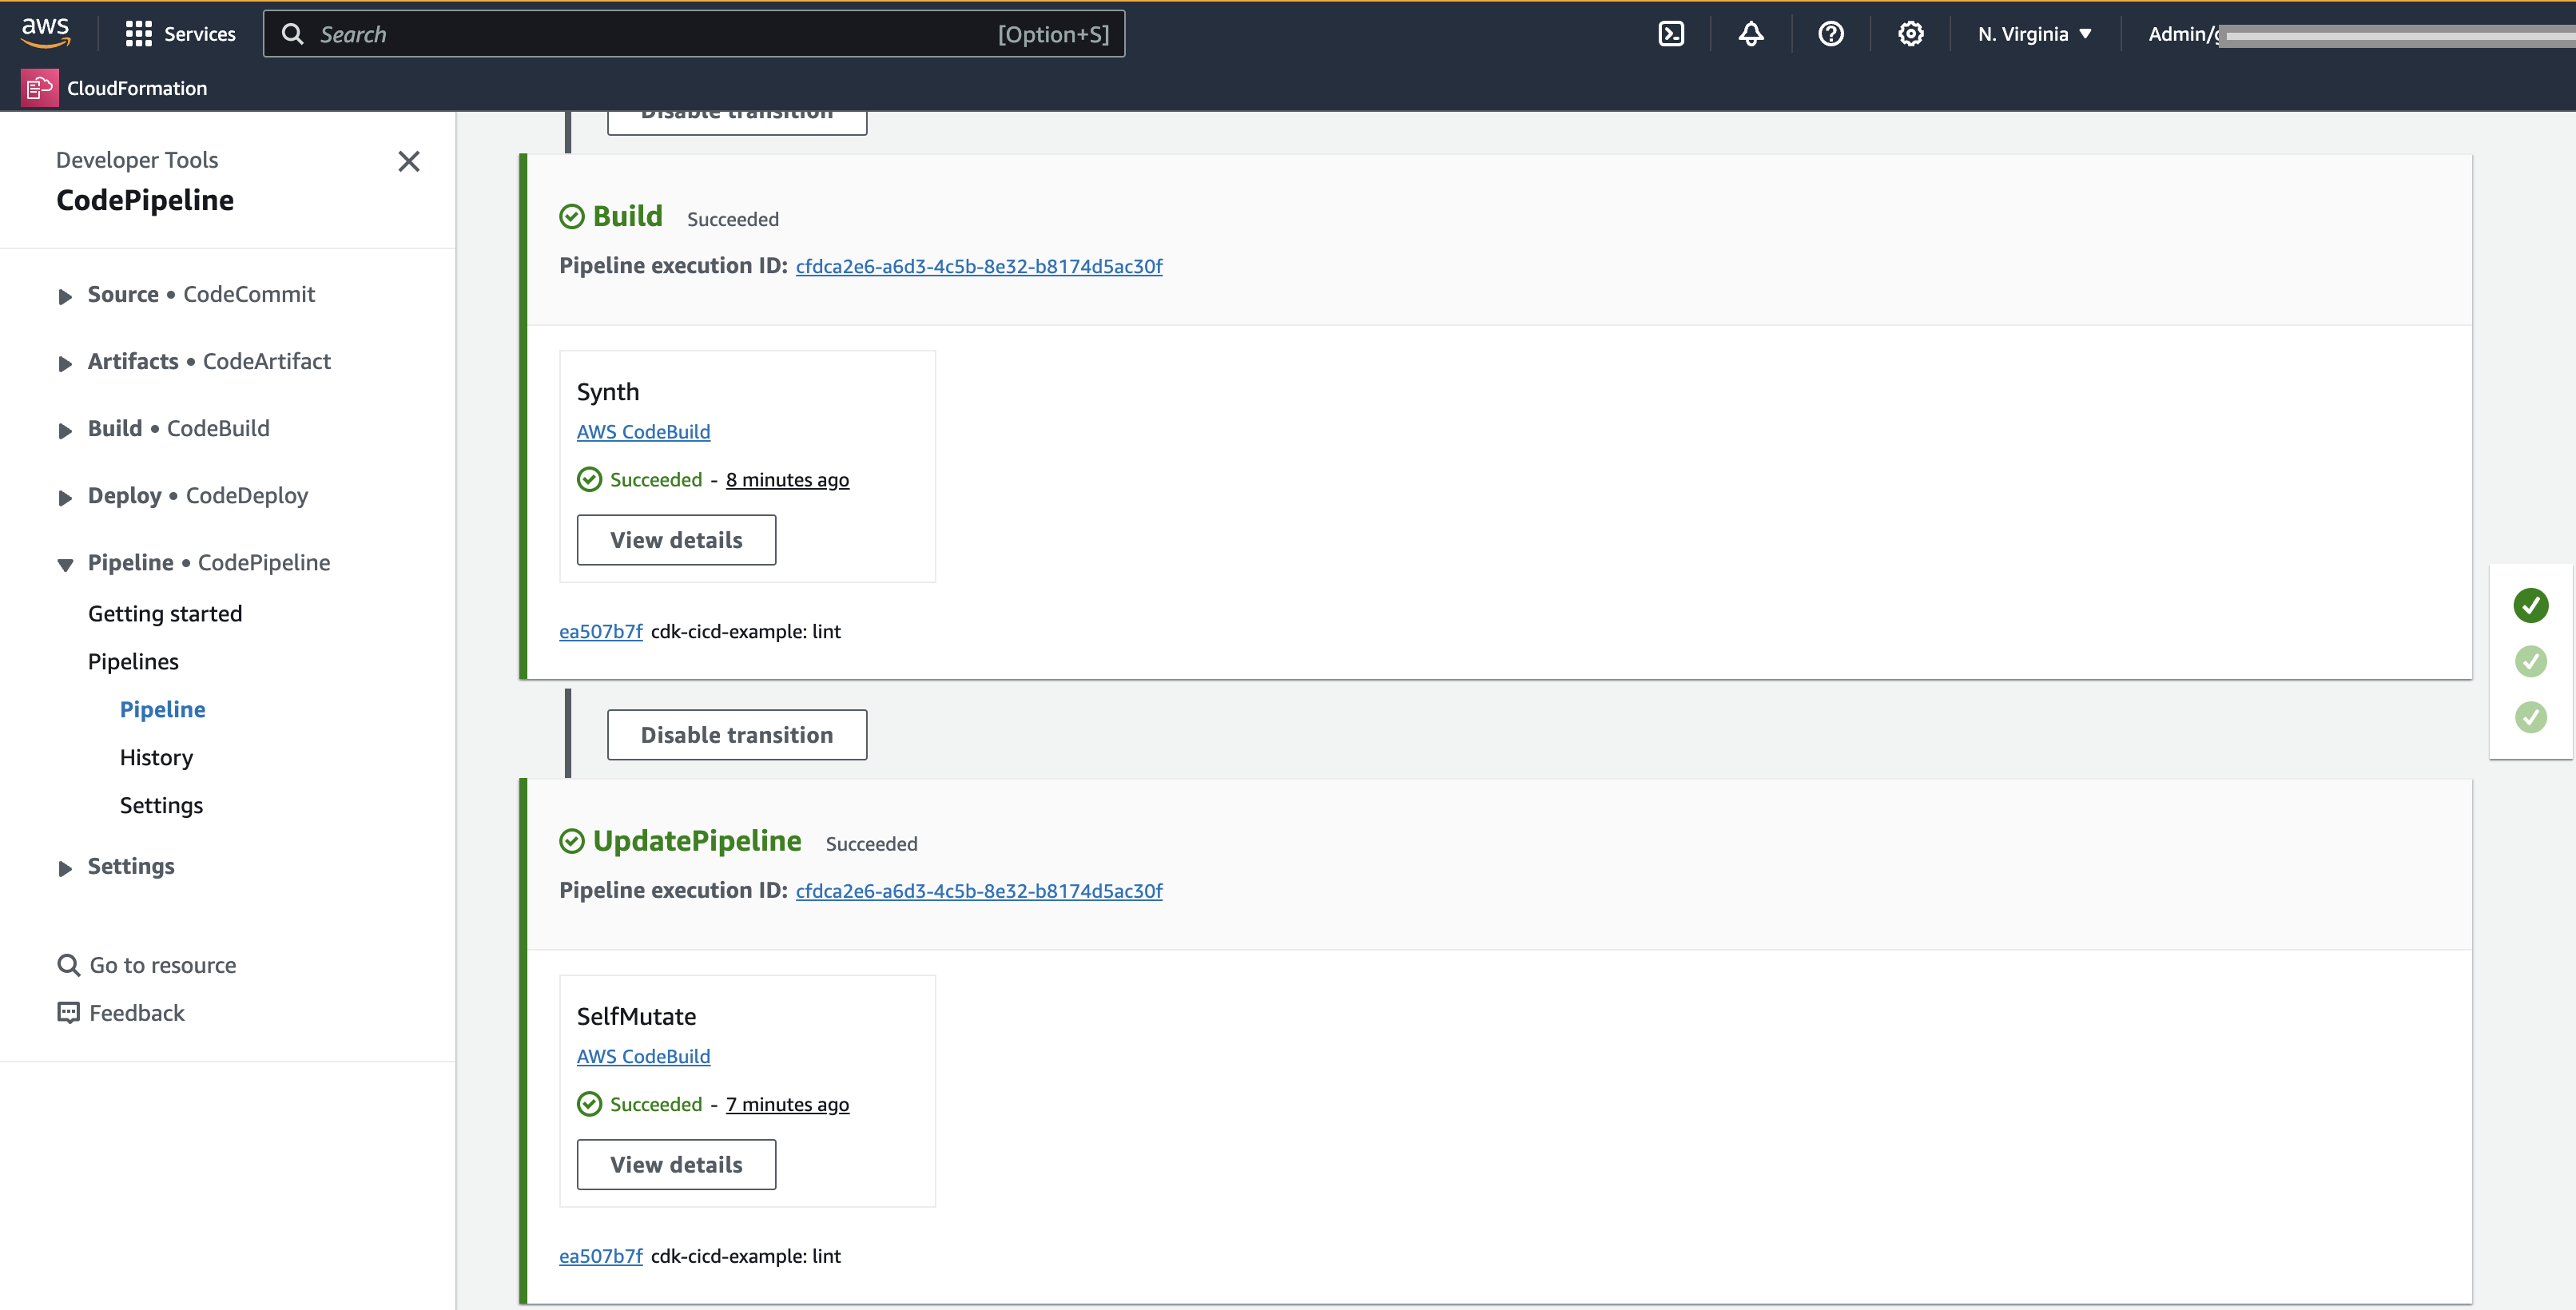
Step 11: Observe the pipeline
- Navigate to the AWS CodePipeline console.
- Select the pipeline and observe the changes as they progress through the pipeline.
- Notice that no changes are deployed to the development environment
Final Notes on Workbench
The Workbench allows infrastructure code to evolve in a controlled, isolated environment. Any changes inside the Workbench are considered work in progress and are not deployed through the delivery pipeline until they are mature enough. This helps avoid long-living branches, simplifies code merging, and accelerates development by providing immediate feedback through the Workbench environment.
Your Team can new deploy your stack into their own Workbench environment.
Click Next to continue to the next section.